
In this article, you'll learn:
- Who has permissions to create integrations in Starred
- How to set up your Workday account for the integration
- How to integrate Starred with Workday
- Which fields are necessary for the report and how you can add extra fields that you need
What permissions do you need to do this?
- In Starred: you need to be an Admin.
- We recommend integrating Workday with Starred using a dedicated Workday Admin account that will remain active. If the Workday user who sets up the integration is later removed, Starred gets disconnected.
Set up your Workday account
In order to enable the Workday<>Starred integration, you first need to complete the below steps from your Workday environment: A. Create Integration System User B. Create Integration Security Group C. Create Report Definition
Create Integration System User
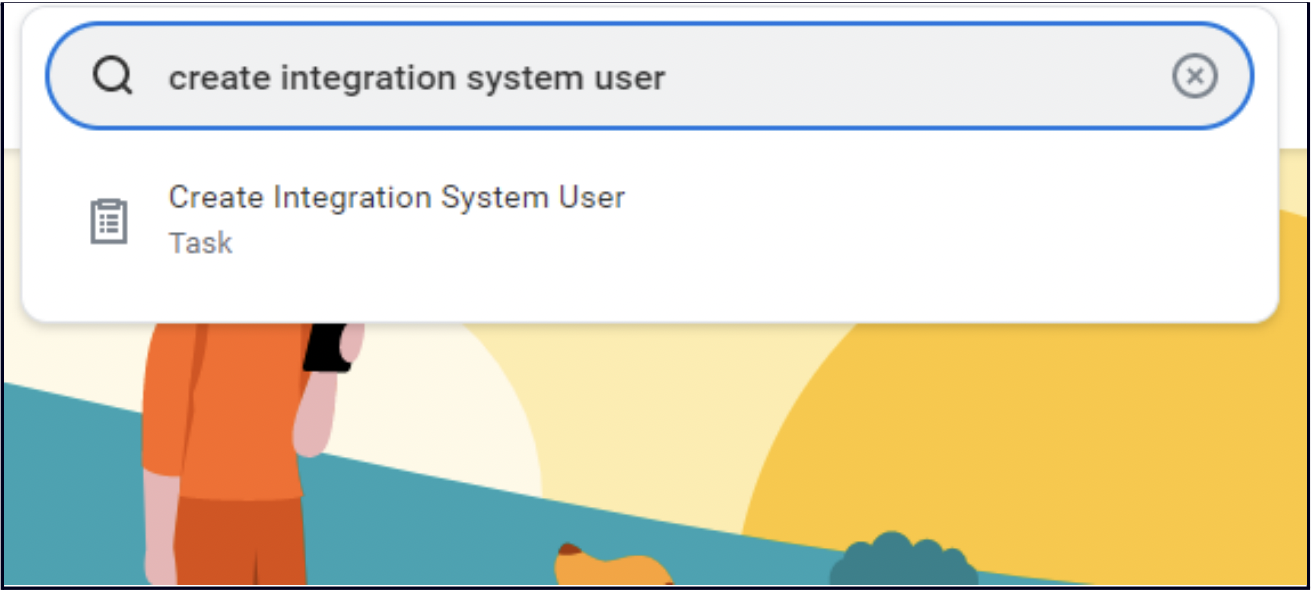
- Type “Create Integration System User” in the Search Box and select the option in the list.
- Assign fields like User Name, New Password and New Password Verify. For the User Name put 'ISU_Starred', and click OK.
Please note Note down the username and password as these need to be shared with Starred.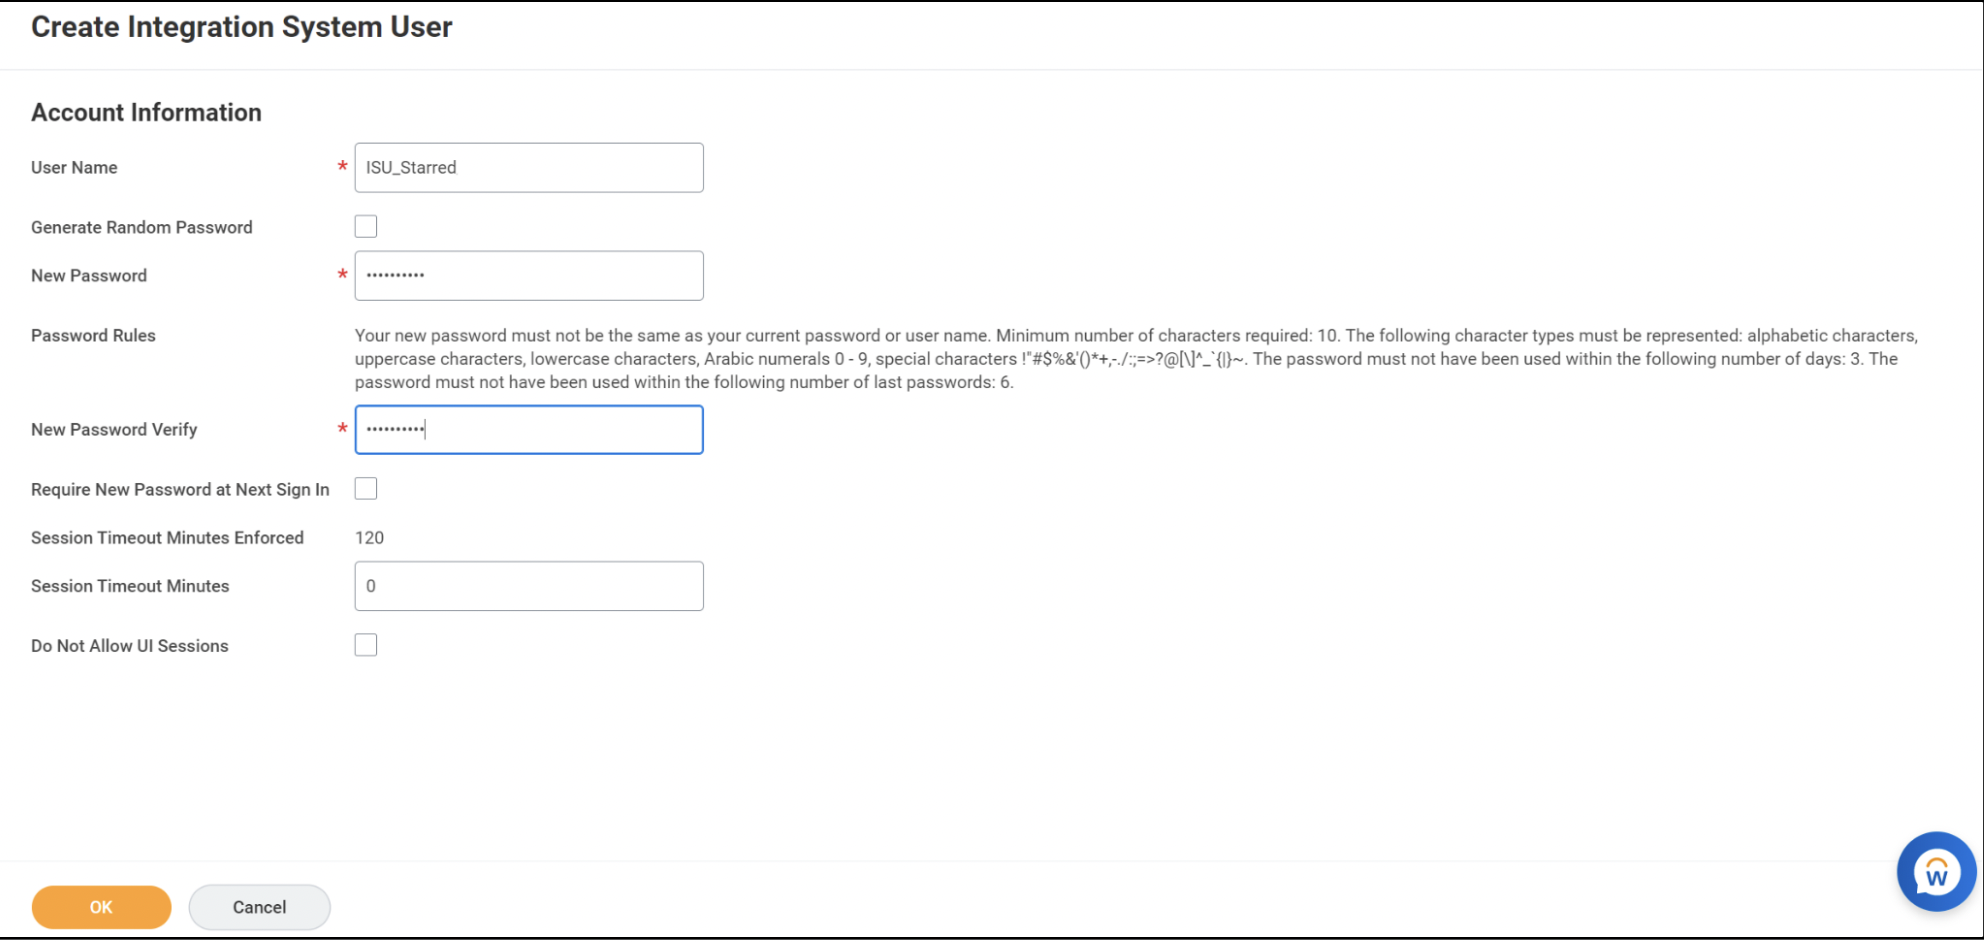
Create Integration Security Group
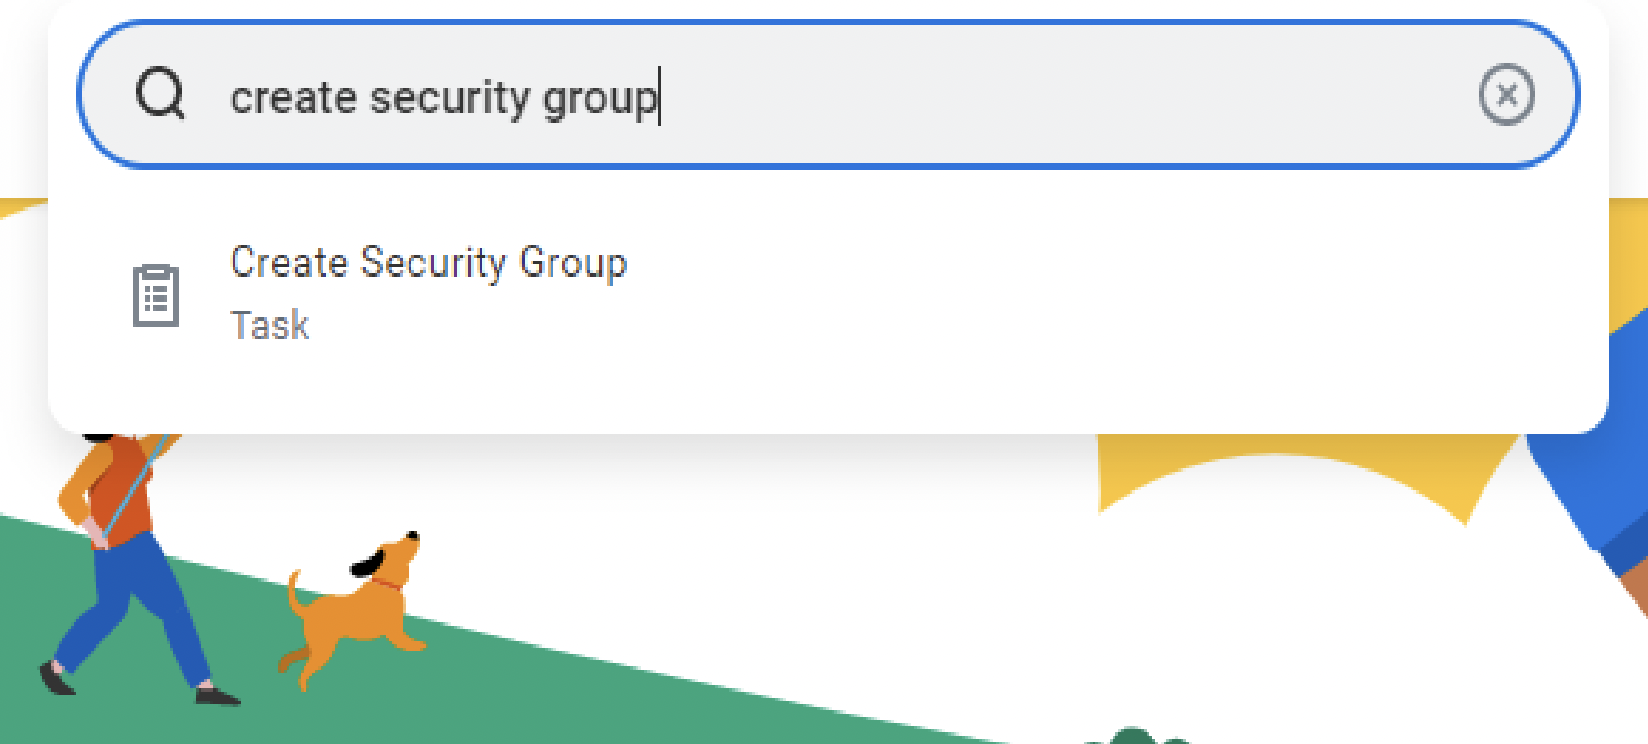
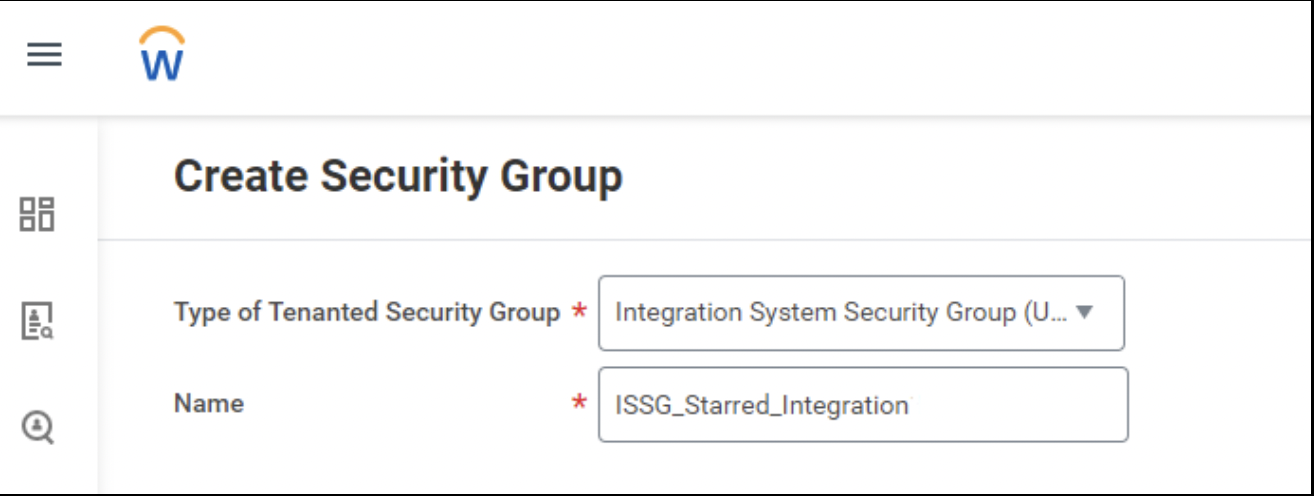
- Type “Create Security Group” in the Search Box and select the option in the list.
- For the option 'Type of Tenanted Security Group', select Integration System Security Group (Unconstrained) from the drop-down list.
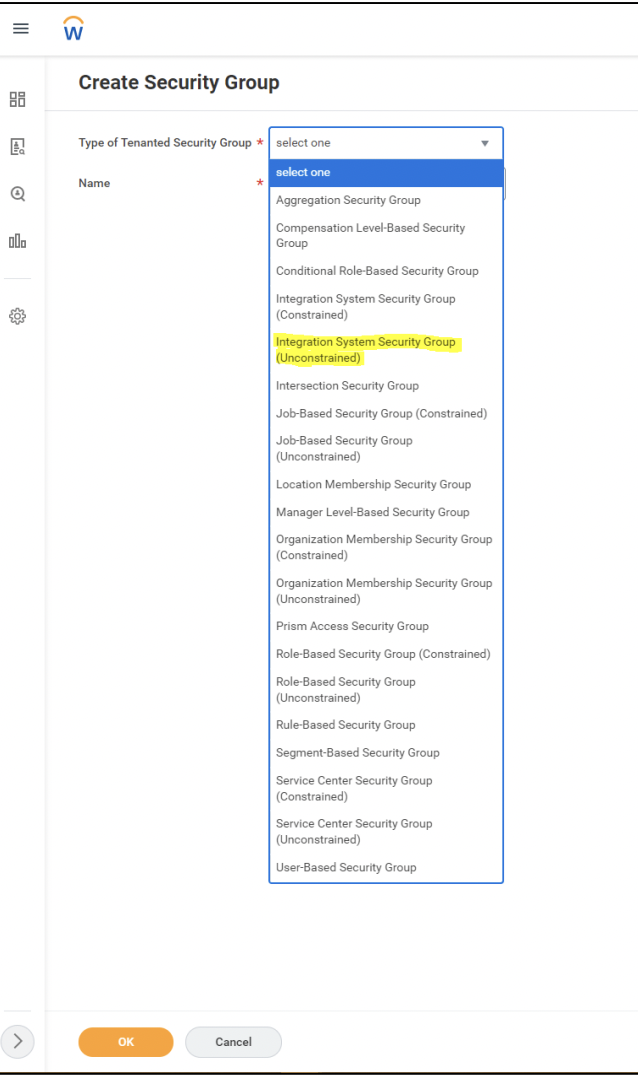
- For the option Name, type “ISSG Starred Integration” and click OK.
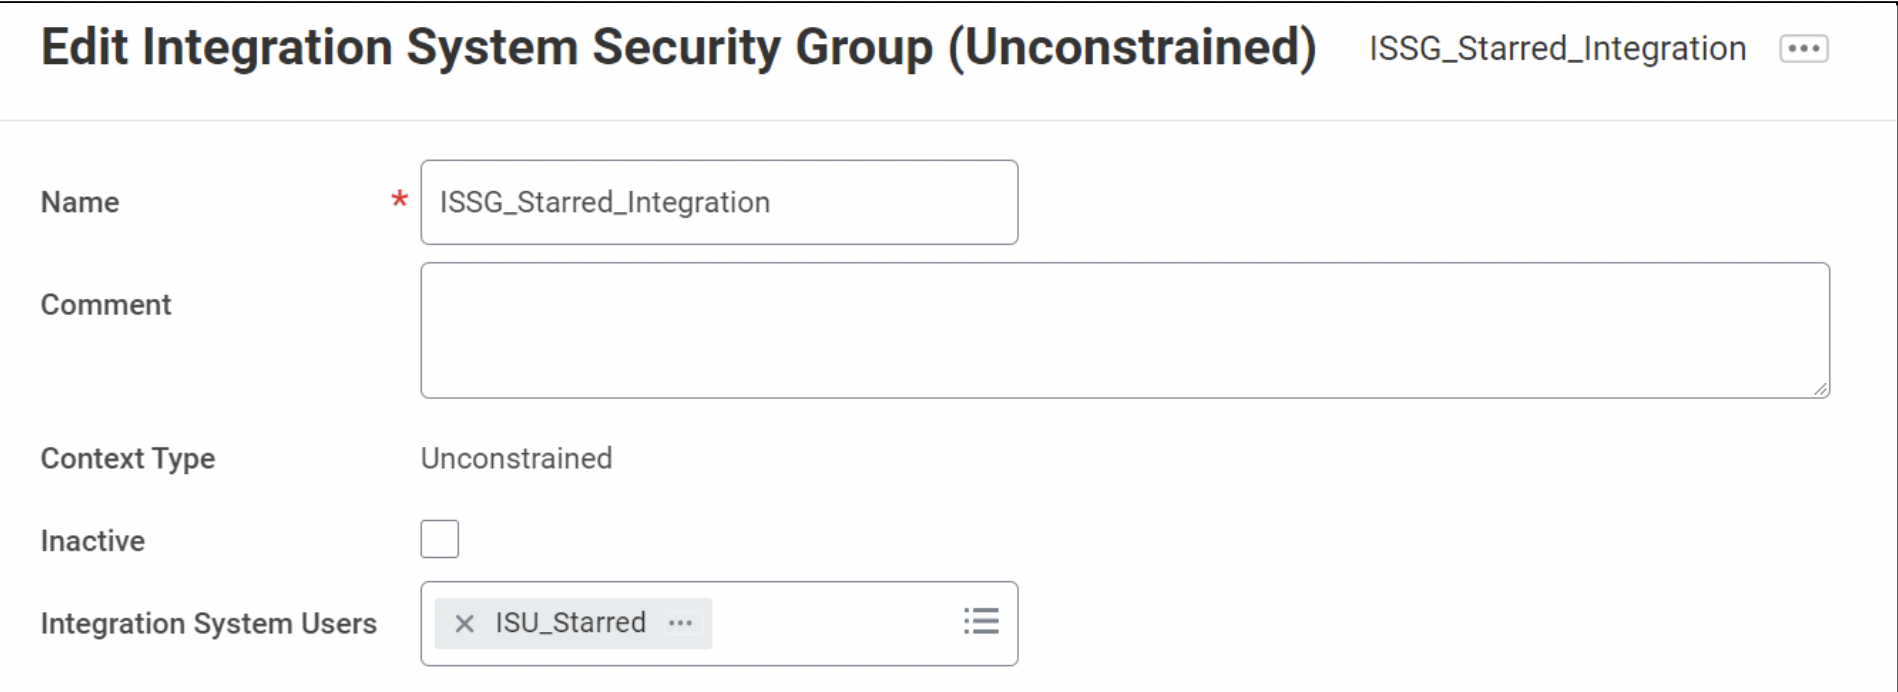
- On the next page titled “Edit Integration System Security Group (Unconstrained)”, click on the box for Integration System Users and search for “ISU_Starred” and select it. Click OK.
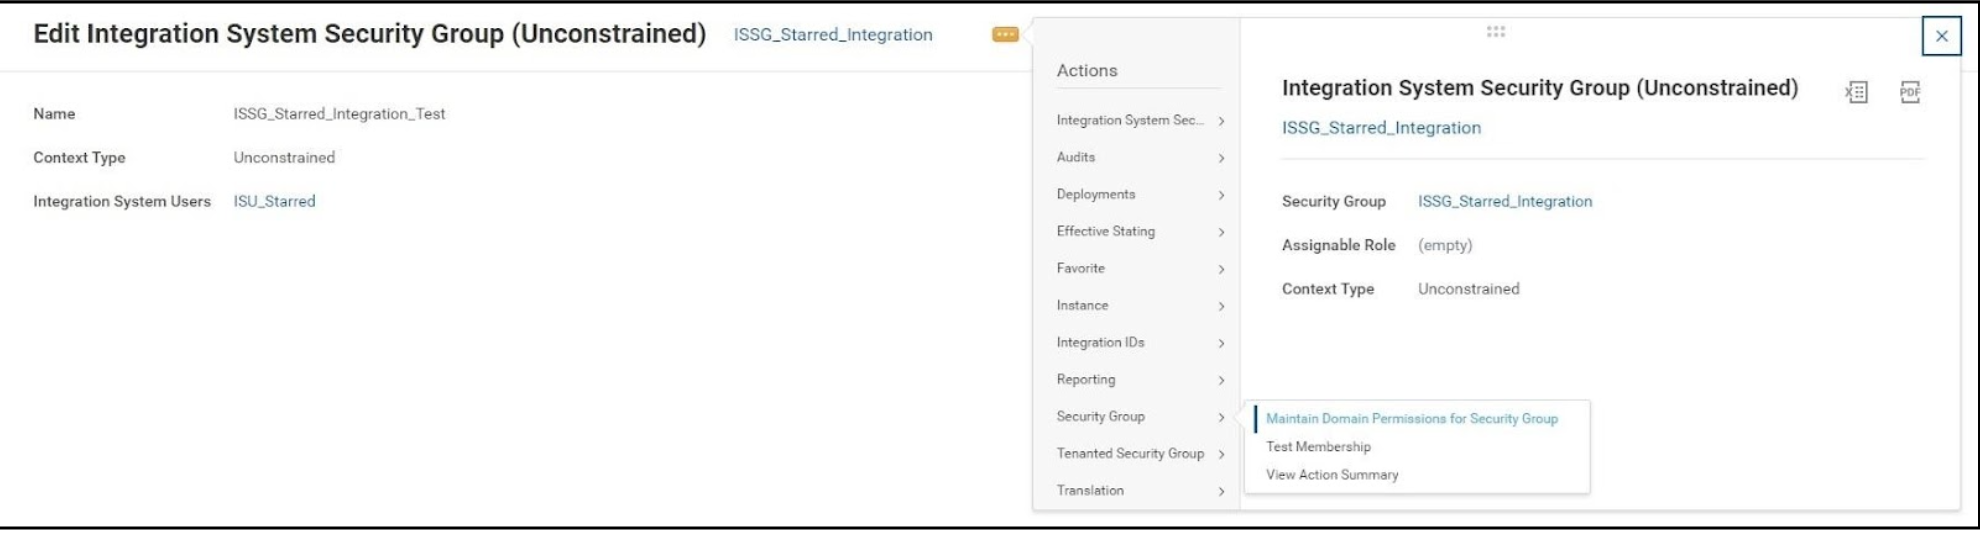
- Click on the related actions (i.e., the three dots) for the Security Group and navigate to Security Group -> Maintain Domain Permissions for Security Group.
- On the next page, fill the various domain security policies as per different operations (View/Modify = Report/Task Permission and Get/Put = Integration Permission):
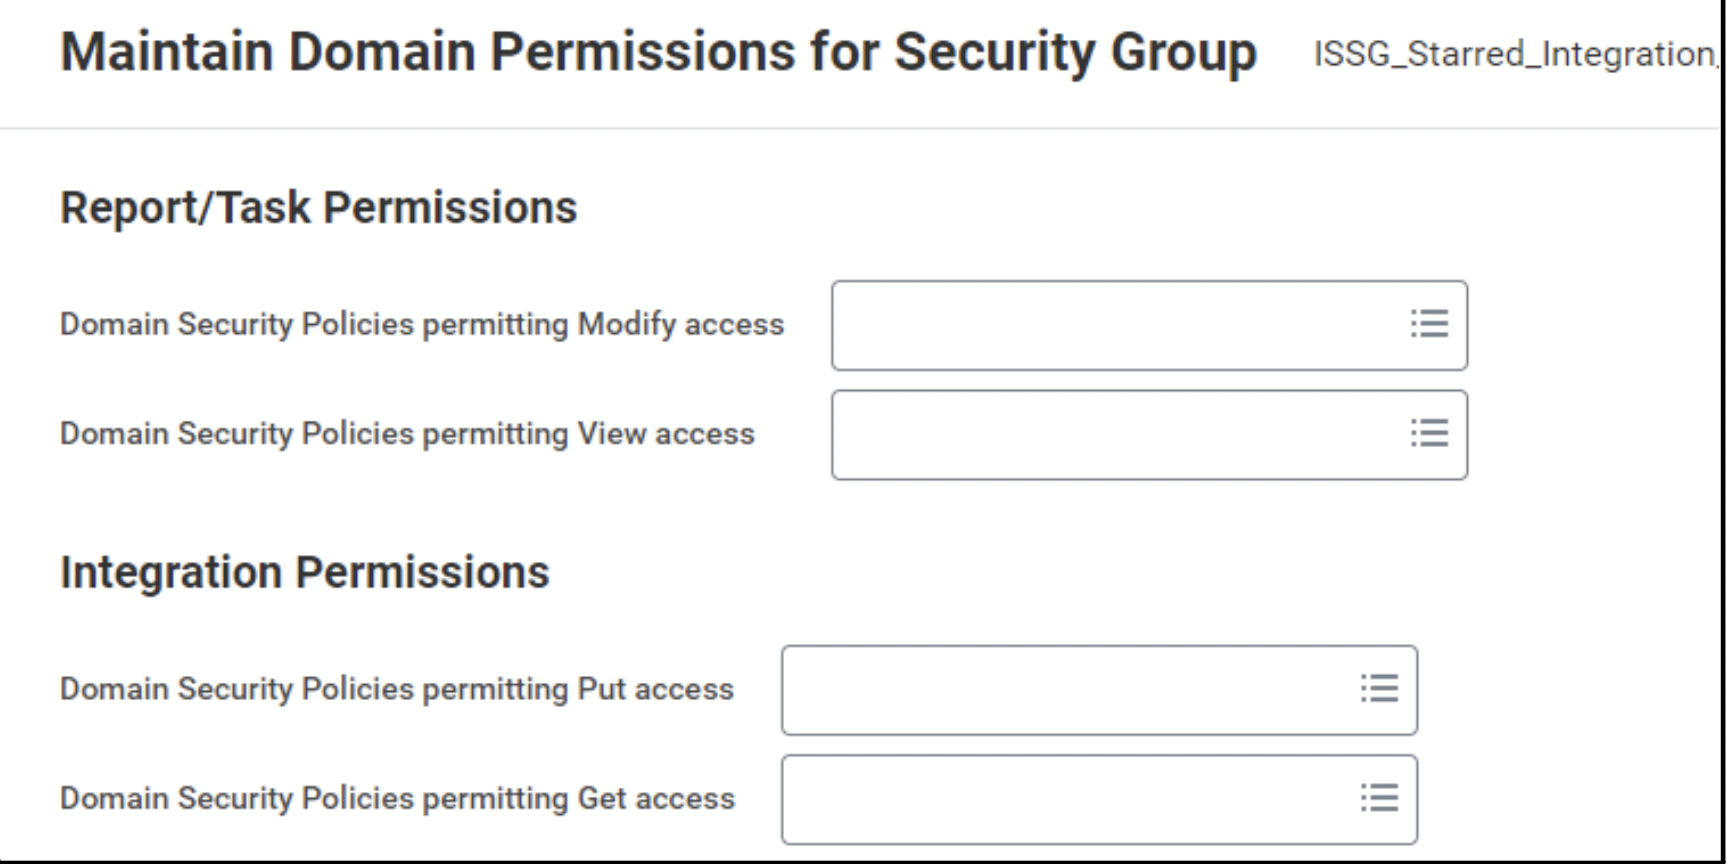
They refer to this table: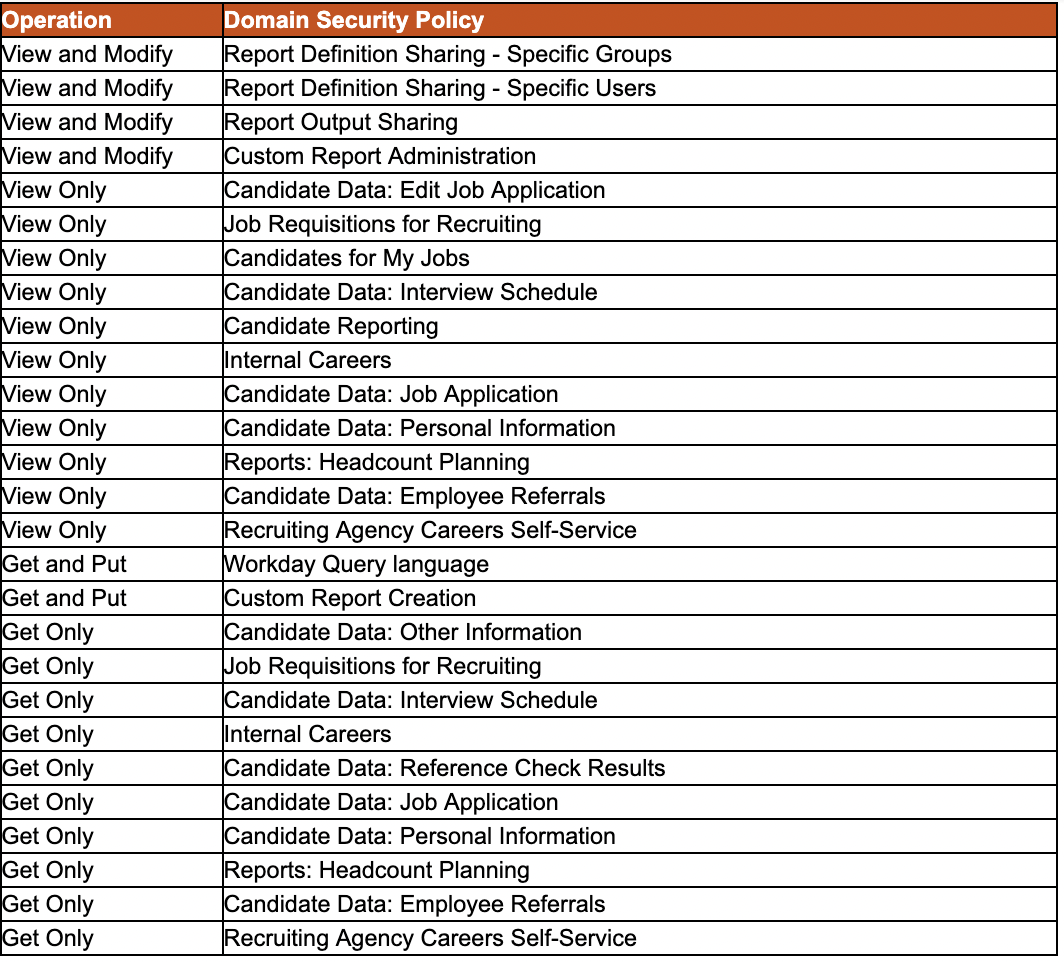
- Click OK and then Done.
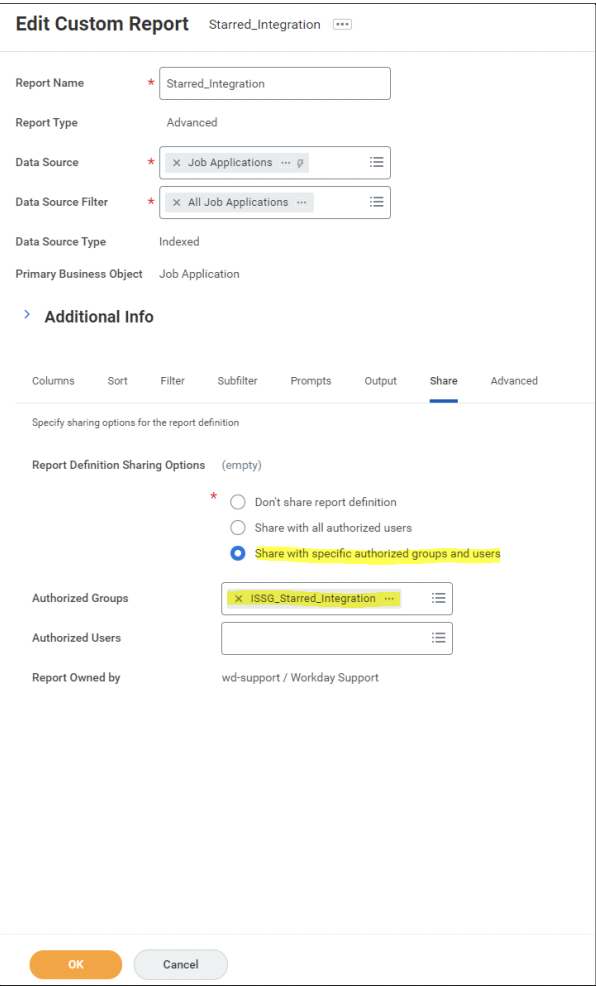
Create Report Definition
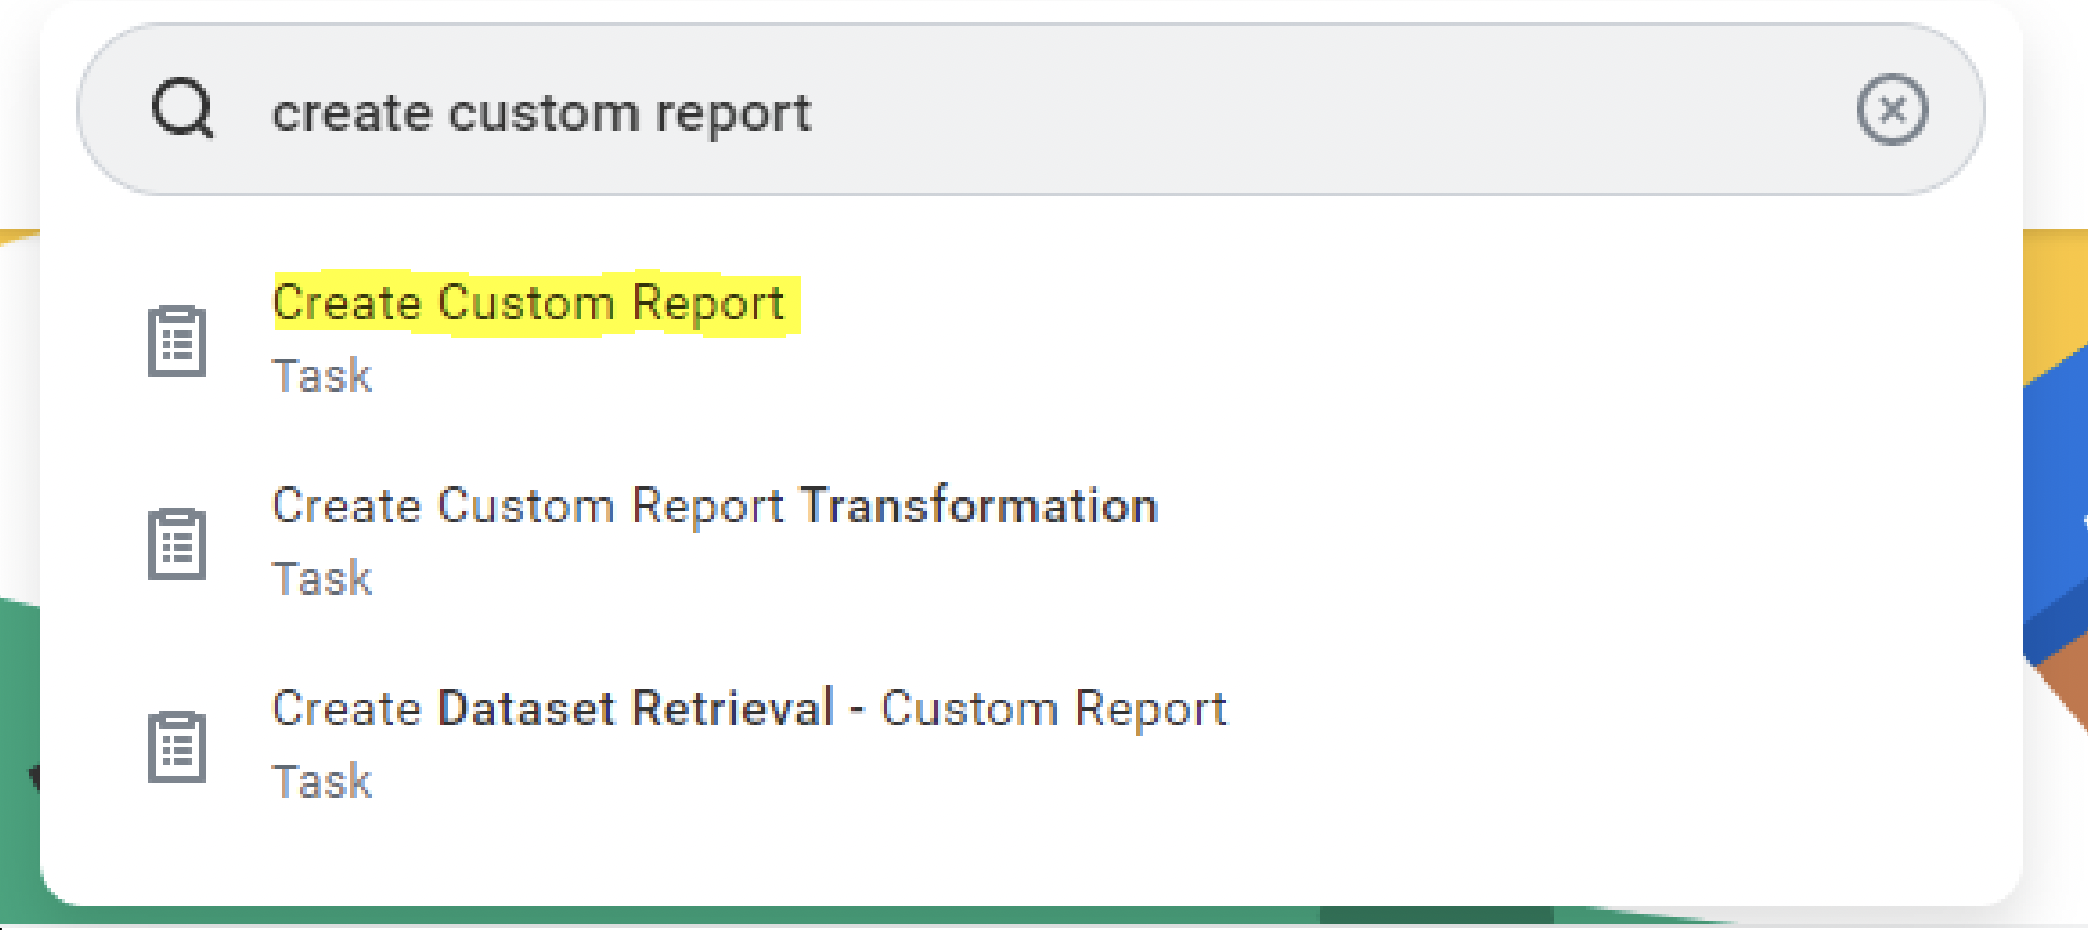
- Type Create Custom Report in the Search Box and select the option in the list.
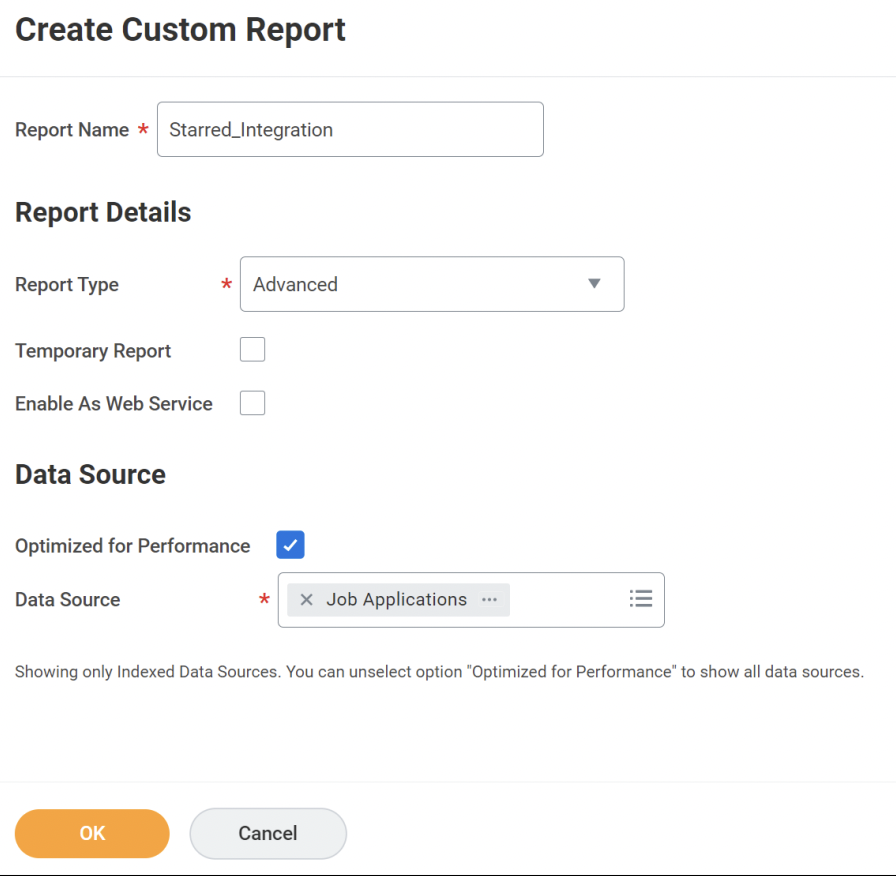
- Fill the various fields as follows. Check if the report name is exactly: ‘Starred_Integration’.
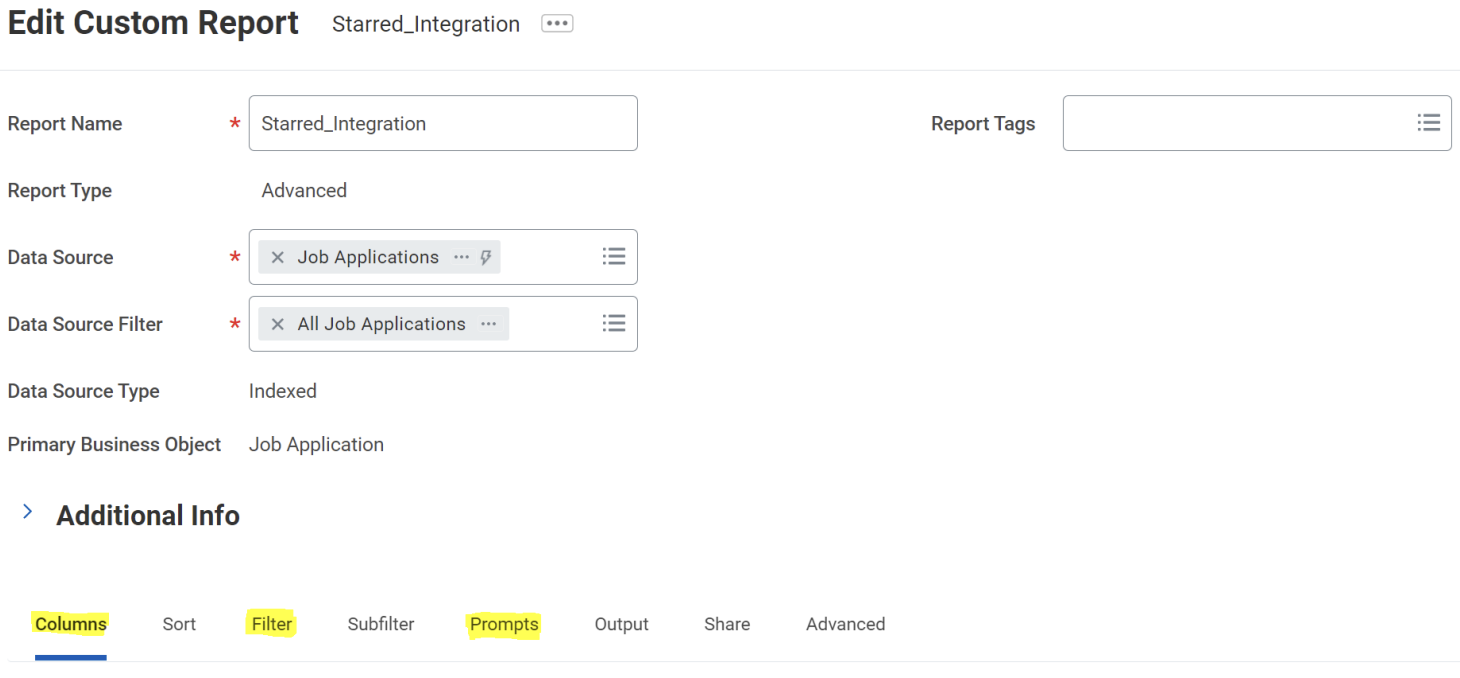
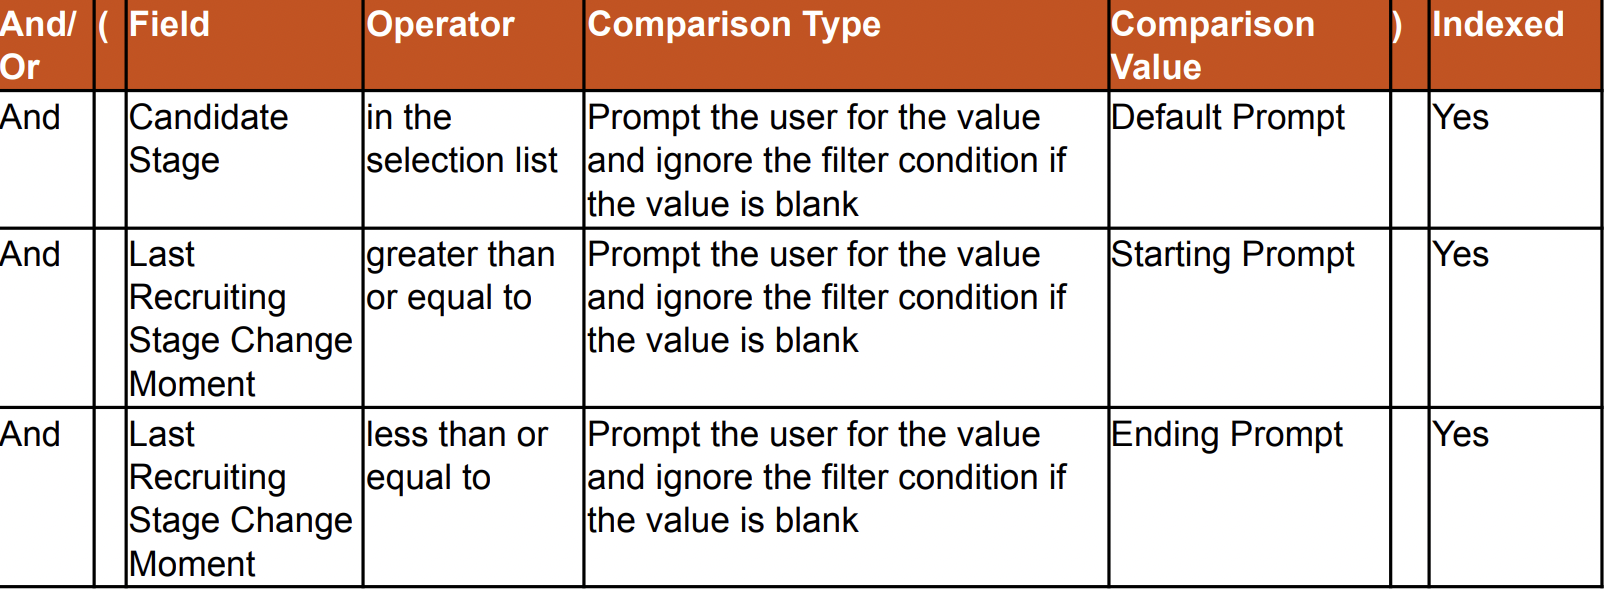
- On the next page, fill in the details in tabs: Columns, Filter and Prompts as per the tables below.
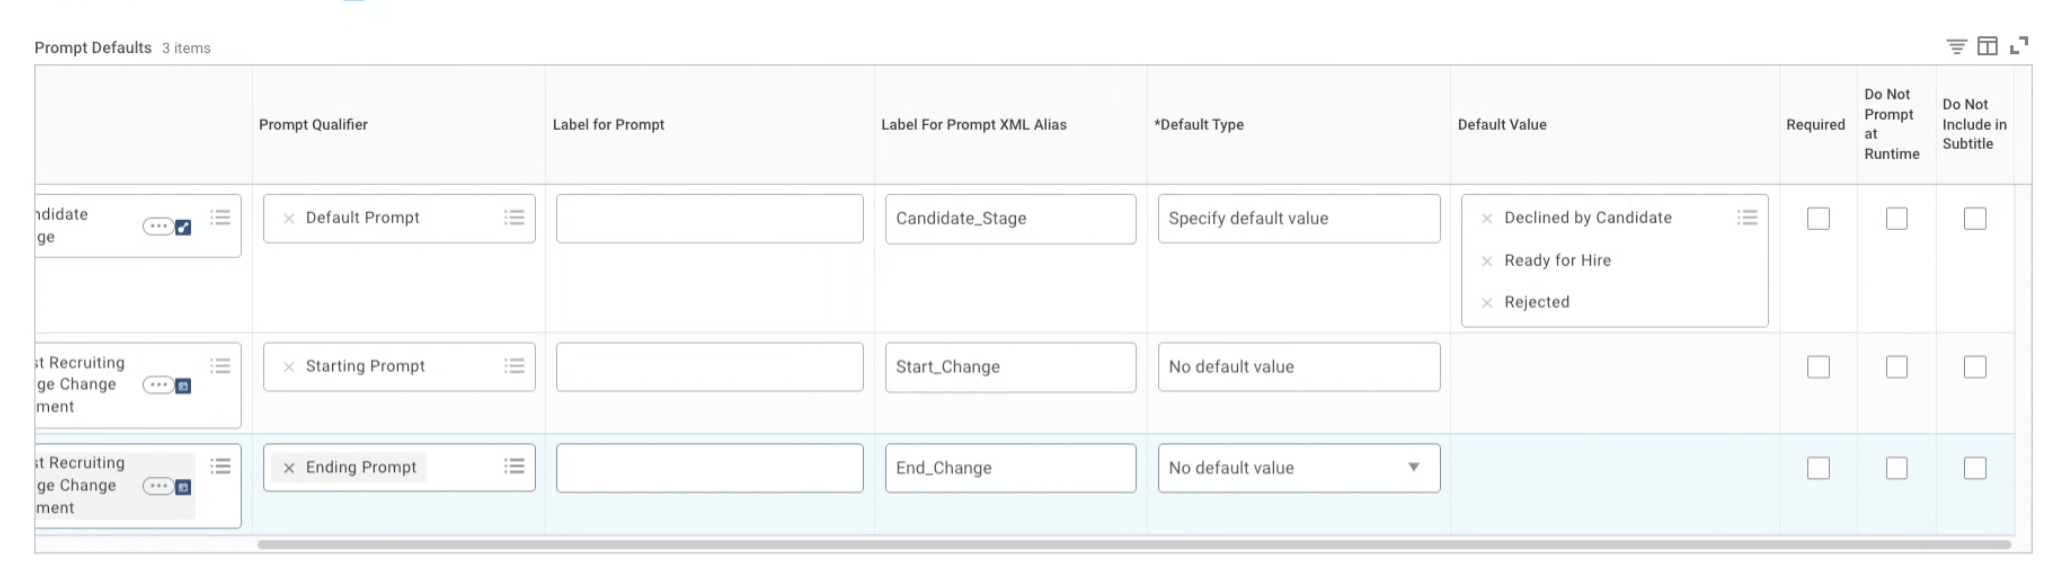
⚠️Disable 'Do not prompt at runtime'. See screenshot below
Columns
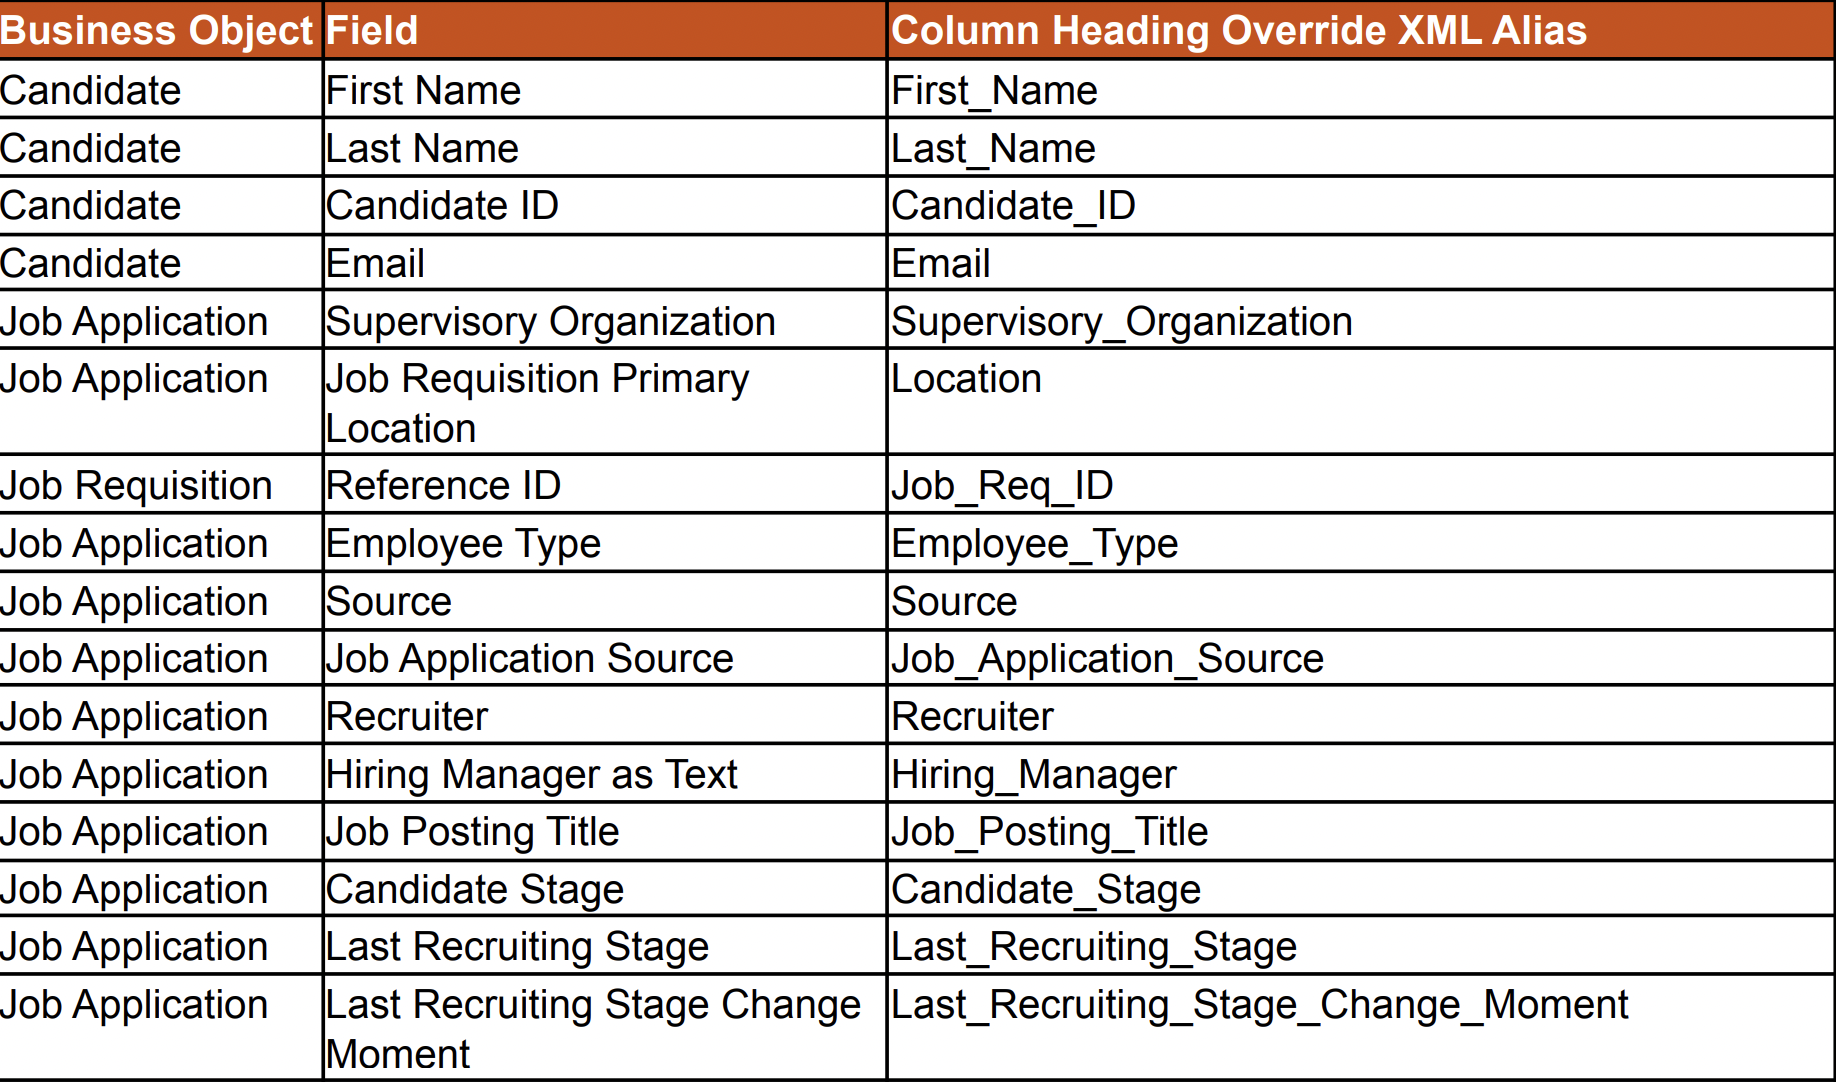
💡Please note:
- Ensure the column order and spelling match the table exactly, including underscores and capitalization.
- Additional fields can be added after the standard columns, as needed.
- Each Business Object must include more than one field to display correctly in Starred.
 Prompts
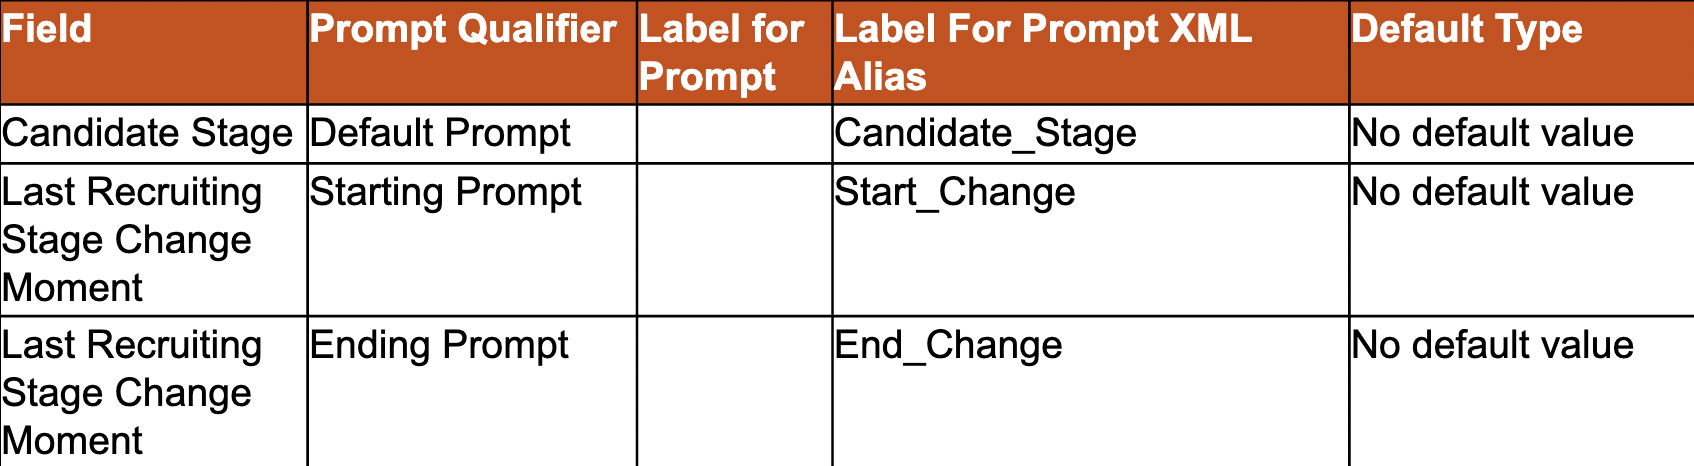
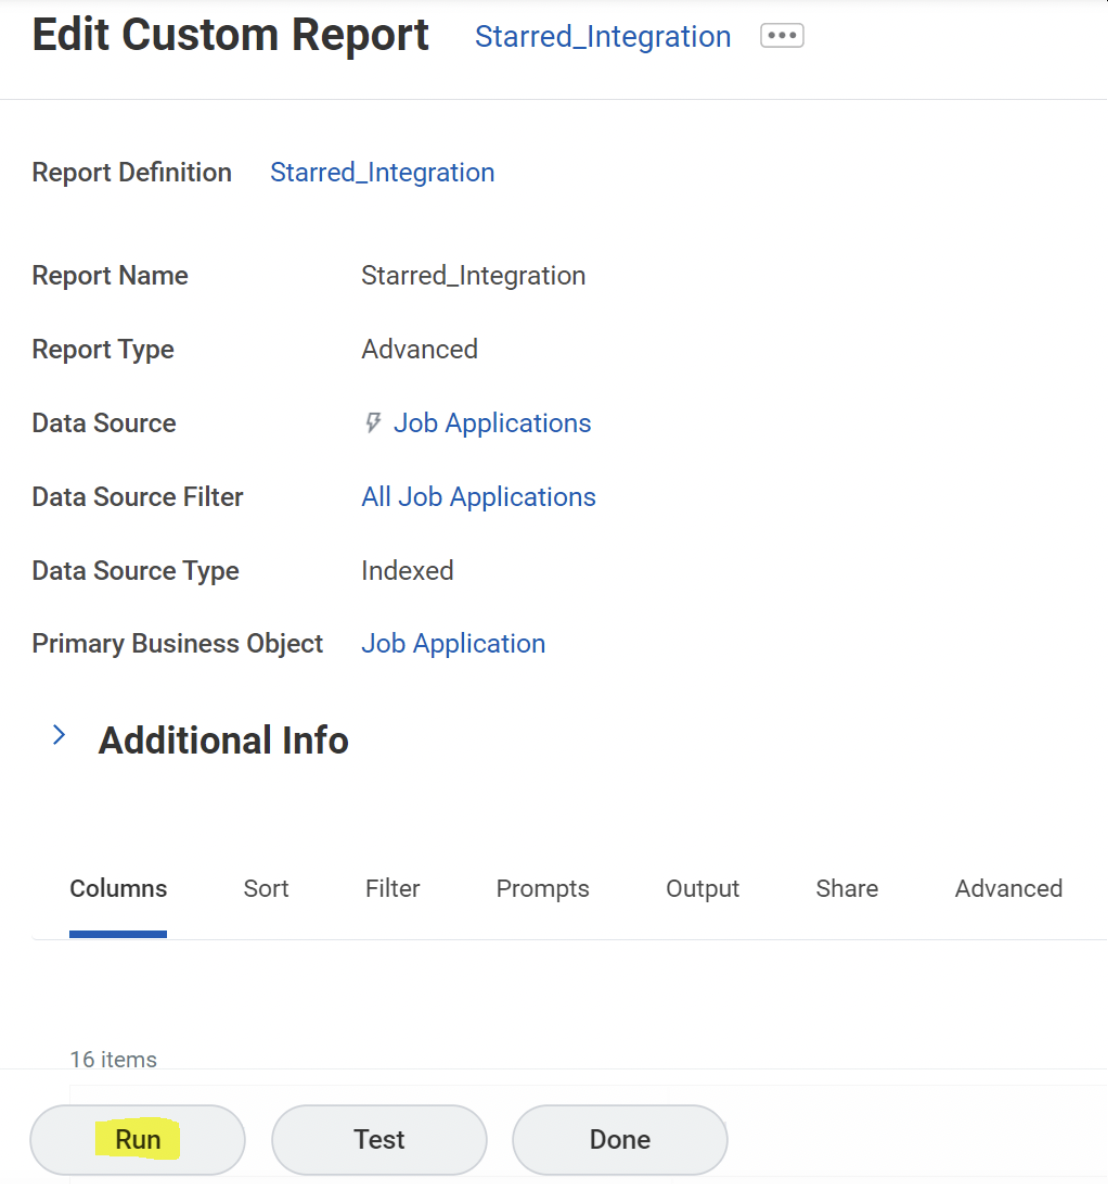
5. On the next page, click Run (at the bottom) to run the report.
How to connect Workday with Starred
- Go to your Settings
- Click on Integrations
- Find Workday in the list
- Click on Connect
- Enter all the information you have from the previous steps:
- Report URL
- Integration Security User (ISU)
- ISU Password
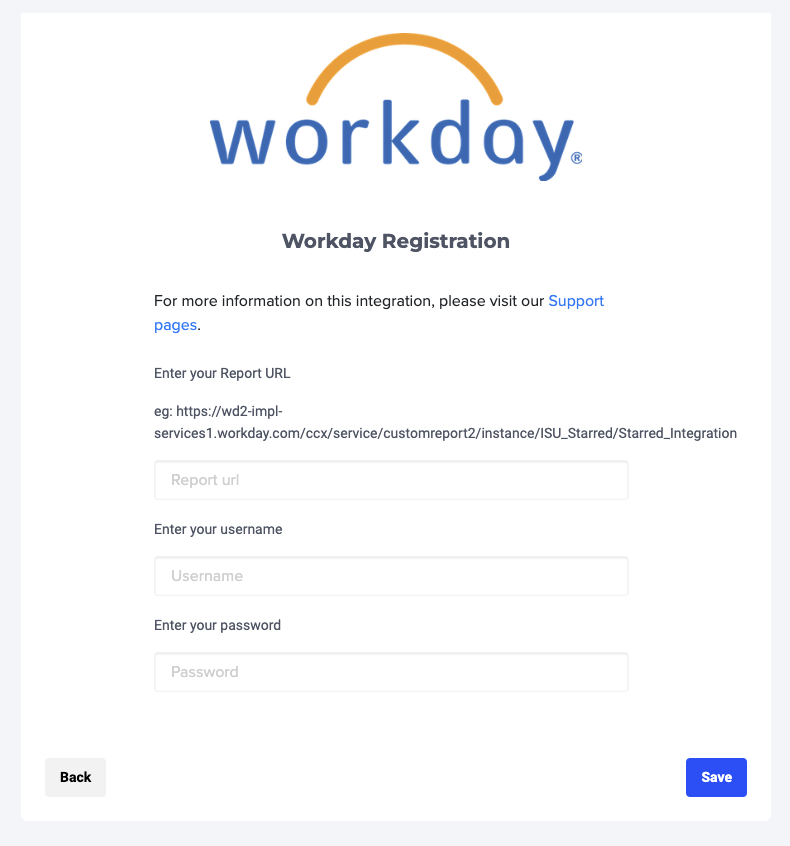
If you’ve done that correctly you should see a confirmation message. After that, you will be redirected to set up your first workflow.