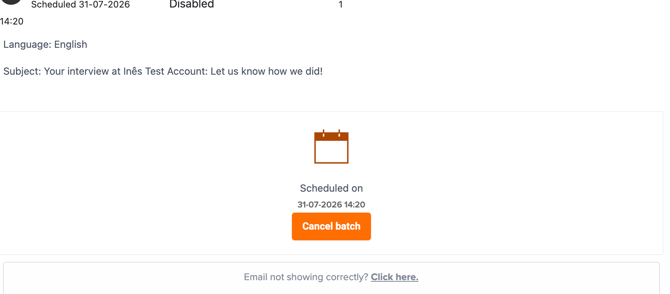
Before you can cancel a batch, you first need to identify which batch belongs to the candidate.
Information you'll needMake sure you have the following details:
- Candidate's name and email address
- Date and time when the candidate was rejected, hired, or withdrew
- The rejection stage (this tells you which workflow and survey to look for)
Example
- Name: Mathias Test 2
- Email: mthoms@starred.com
- Rejection stage: Skills Test
- Rejection date and time: 27-07-2026 14:53
Note: The timestamps shown in the Logs are displayed in your own time zone. If the rejection, hiring, or withdrawal happened in a different time zone, make sure to convert the time before searching for the correct batch.
Step 1: Find the correct logGo to Integrations → Logs.
Using the rejection stage, determine which workflow the candidate should have entered. In this example, the candidate was rejected during the Skills Test stage, which belongs to the Candidate Rejected after Interview workflow.
Filter the logs by:
- The correct workflow
- Success status
- If you cannot find it, filter by stopped (the survey might have not been sent)
The filters are highlighted below.
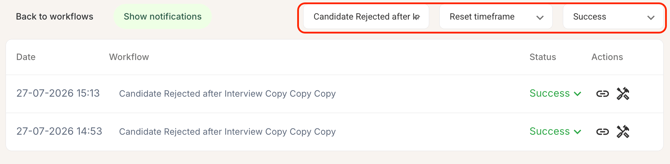
Next, open the log that matches the correct date and time, and verify that it belongs to the correct candidate by checking the candidate details.
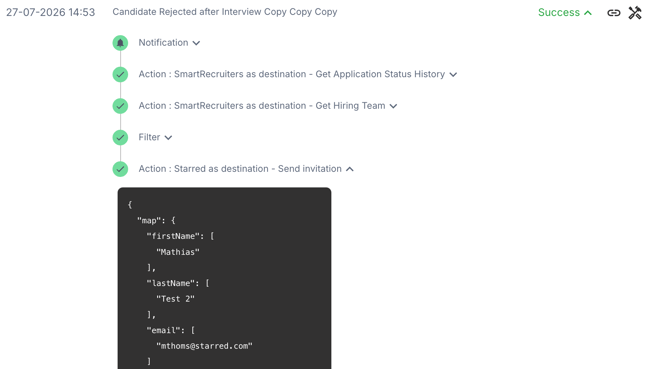
Check the delay of the survey in the workflow in the last action step. This will be useful in the steps below.
Step 2: Locate the invitation batchOnce you've confirmed the correct log, navigate to the survey that is connected to that workflow.
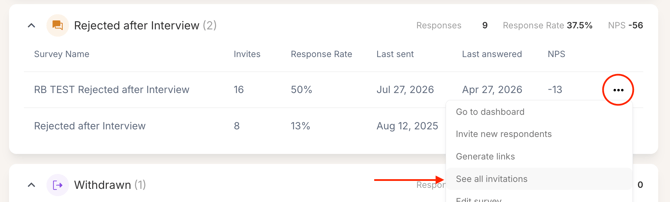
From the Survey Overview page:
- Find the correct survey.
- Click the three dots (⋮).
- Select See all invitations.
Now determine the sendout date.
Use the delay you checked previously and calculate when the invitation would have been scheduled.
In this example, no delay is configured, so the invitation was scheduled immediately.
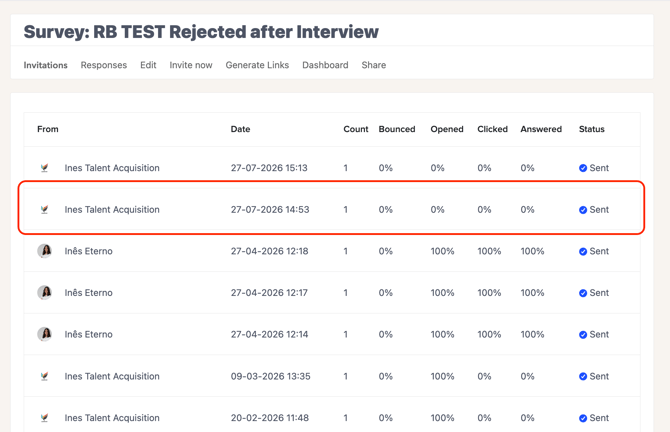
Make sure the date and time match exactly, as scheduled batches do not show the email address of the recipient.
Step 3: Cancel the batchOnce you've located the correct batch, open it and click Cancel.